Where the Problem Started
After understanding the concepts, the next step is to watch a message move through the broker and arrive at a consumer. Kafka configuration and application code are separated enough that a small working example is often the fastest way to learn. This post records that minimal producer-consumer flow in Spring Boot.
Start with Kafka installation.
Implementation Path
brew install kafka

After that

zkServer start //start zooKeeper
kafka-server-start /opt/homebrew/etc/kafka/server.properties //start kafka - if you did not install it with brew, it is under /usr/local/~
Create a simple topic next.
kafka-topics --create --topic test --bootstrap-server localhost:9092 --replication-factor 1 --partitions 1This creates a topic named test on the kafka server (localhost:9092).
replication factor means the number of copies it will have. Here, the number of copies per partition is 1. In a production environment, a replication factor of 3 or higher is recommended for fault tolerance.
partitions simply means the number of partitions. As this number increases, the topic log is distributed in parallel, increasing fault tolerance and scalability.
Then test the producer and consumer briefly from the CLI.
How I Verified It
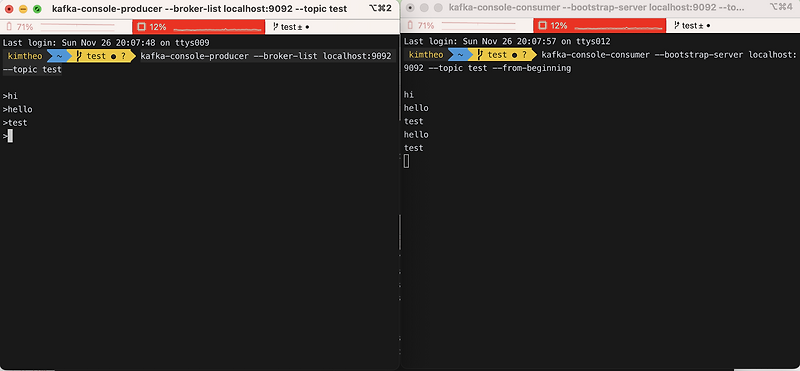
kafka-console-producer --broker-list localhost:9092 --topic test

kafka-console-consumer --bootstrap-server localhost:9092 --topic test --from-beginning
After the CLI test, integrate Kafka with a Spring Boot application.
implementation 'org.springframework.kafka:spring-kafka'Add the dependency to build.gradle.
Next is the admin config that creates a topic. You can do this from the kafka CLI, but it is also possible inside Spring Boot.
@Configuration
public class KafkaTopicConfig {
@Value("${spring.kafka.bootstrap-servers}")
private String bootstrapAddress;
@Bean
public KafkaAdmin kafkaAdmin() {
Map<String, Object> configs = new HashMap<>();
configs.put(AdminClientConfig.BOOTSTRAP_SERVERS_CONFIG, bootstrapAddress);
return new KafkaAdmin(configs);
}
@Bean
public NewTopic topic1() {
return new NewTopic("baeldung", 1, (short) 1);
}
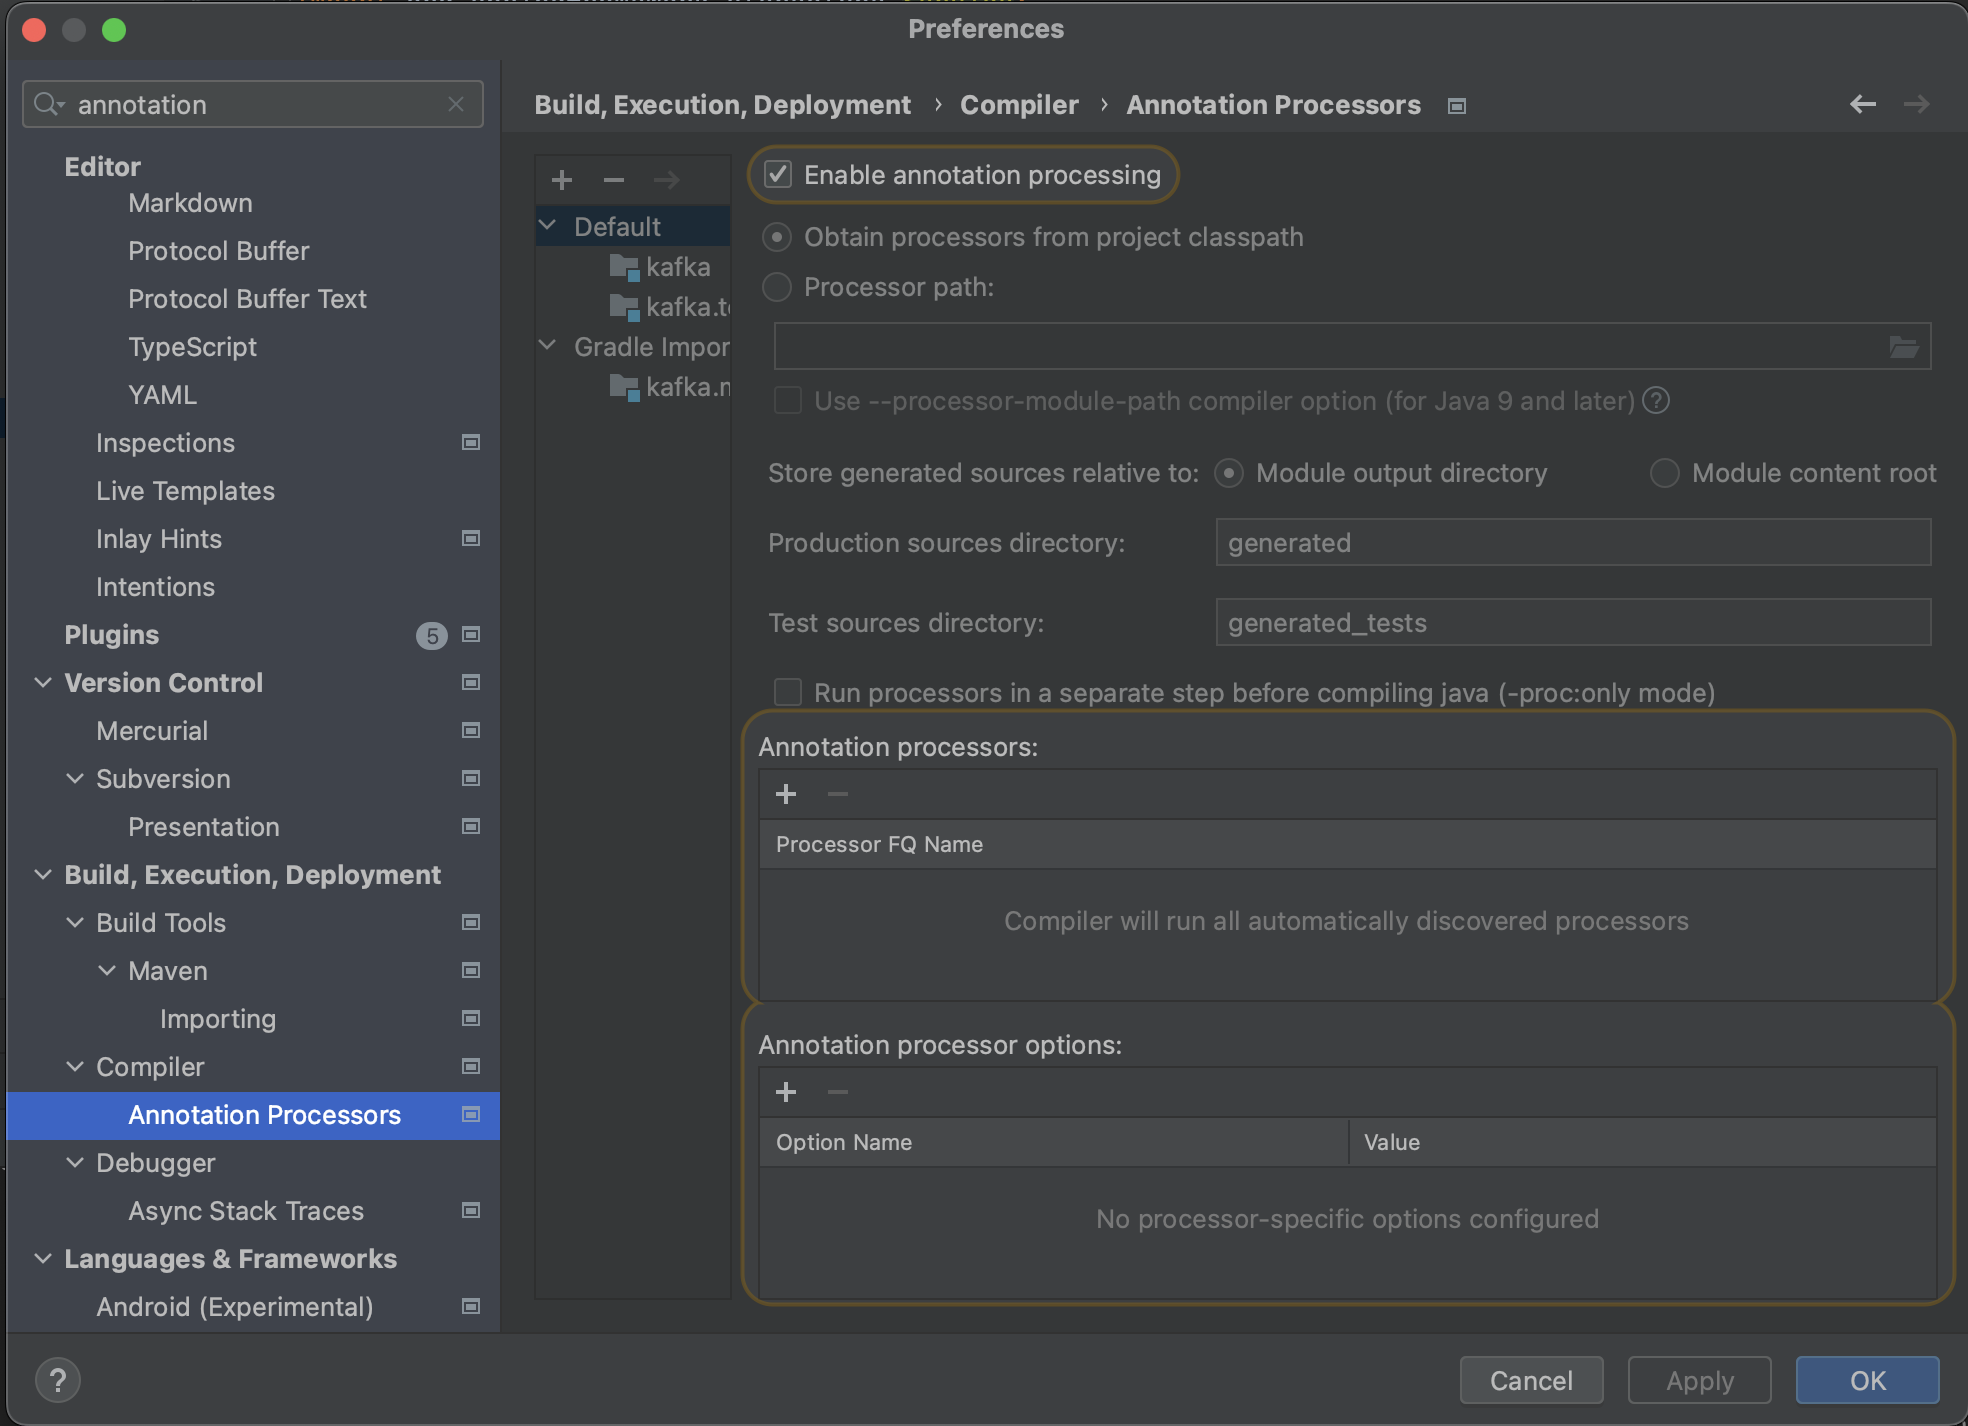
}I make this mistake every time I use the @Value annotation, but when using intelliJ, annotation processing needs to be enabled.
Create the KafkaAdmin bean. configs.put(AdminClientConfig.BOOTSTRAP_SERVERS_CONFIG, bootstrapAddress) sets the bootstrap address in the configuration map.
The NewTopic function below creates a topic programmatically, just as we created a topic with the CLI earlier.
kafka-topics --create --topic baeldung --bootstrap-server localhost:9092 --replication-factor 1 --partitions 1It corresponds to this topic creation command.
Next are the producer and consumer service layers.
@Component
public class KafkaConsumerService {

    @KafkaListener(topics = "test", groupId = "my-group")
    public void listen(String message) {
        System.out.println("Received message in group 'my-group': " + message);
    }
}

@Service
public class KafkaProducerService {

    @Autowired
    private KafkaTemplate<String, String> kafkaTemplate;

    public void sendMessage(String topic, String message) {
        kafkaTemplate.send(topic, message);
    }
}
Practice Takeaway
Even a small example makes Kafka less abstract once producer, topic, consumer group, and serialization have been exercised directly. Real services later need retry behavior, ordering, idempotency, and schema management, but the first anchor is simply seeing where the message moves.
Because these are supported APIs, the implementation itself is straightforward.